Ever see those really ornate gilded frames and wonder how they’re made?
I’m talking frames like these:
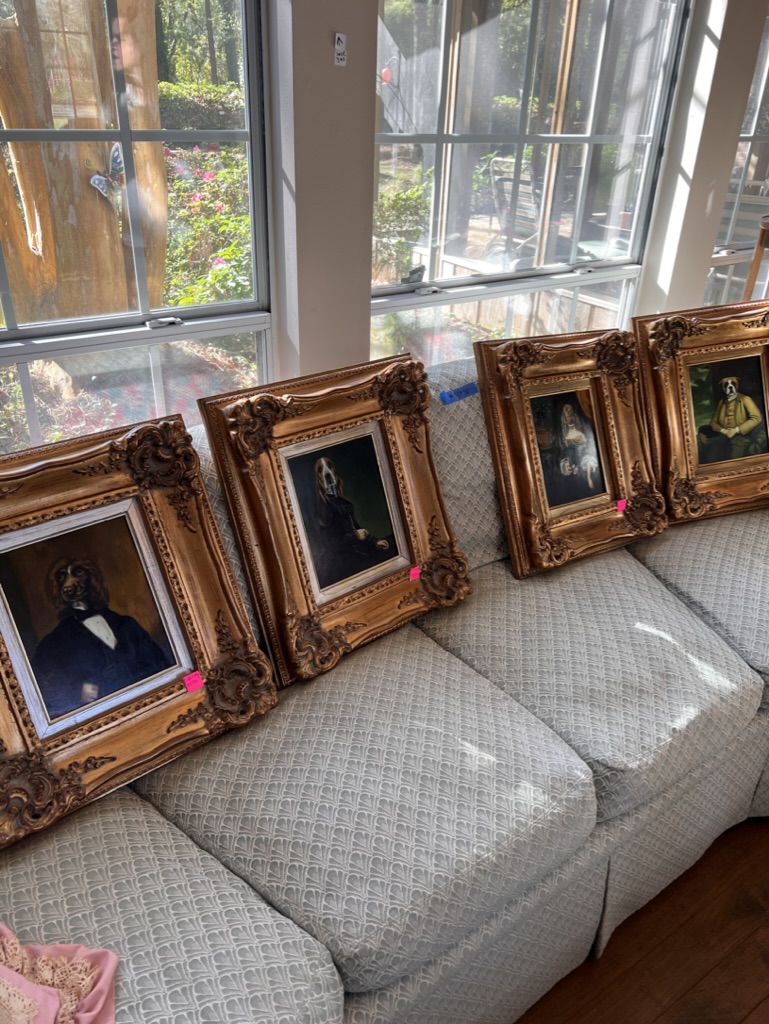
By the way, I took this picture at a really fancy estate sale. I thought the portraits were so funny. But they wanted over $1000 per portrait, and that simply wasn’t in my allotted budget.
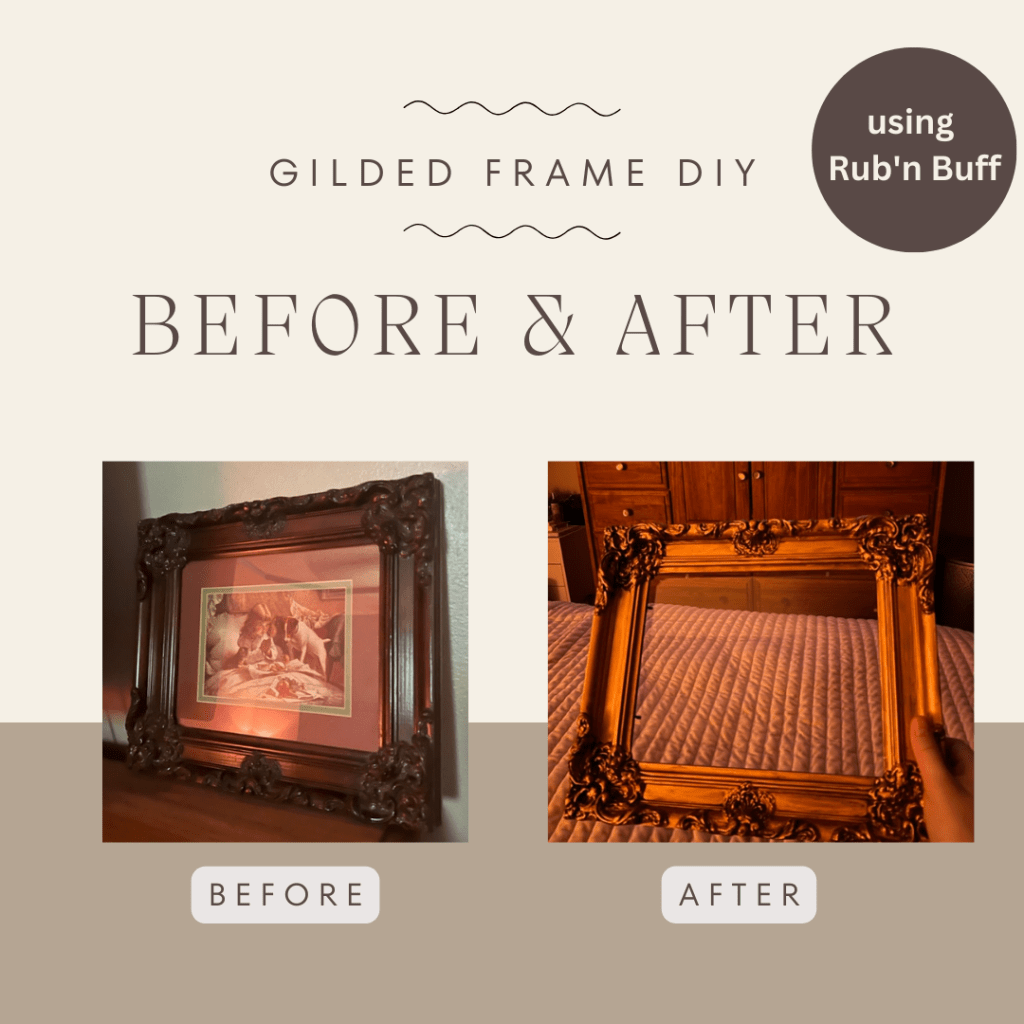
Later on I was strolling an antique store and saw this framed art for $12:
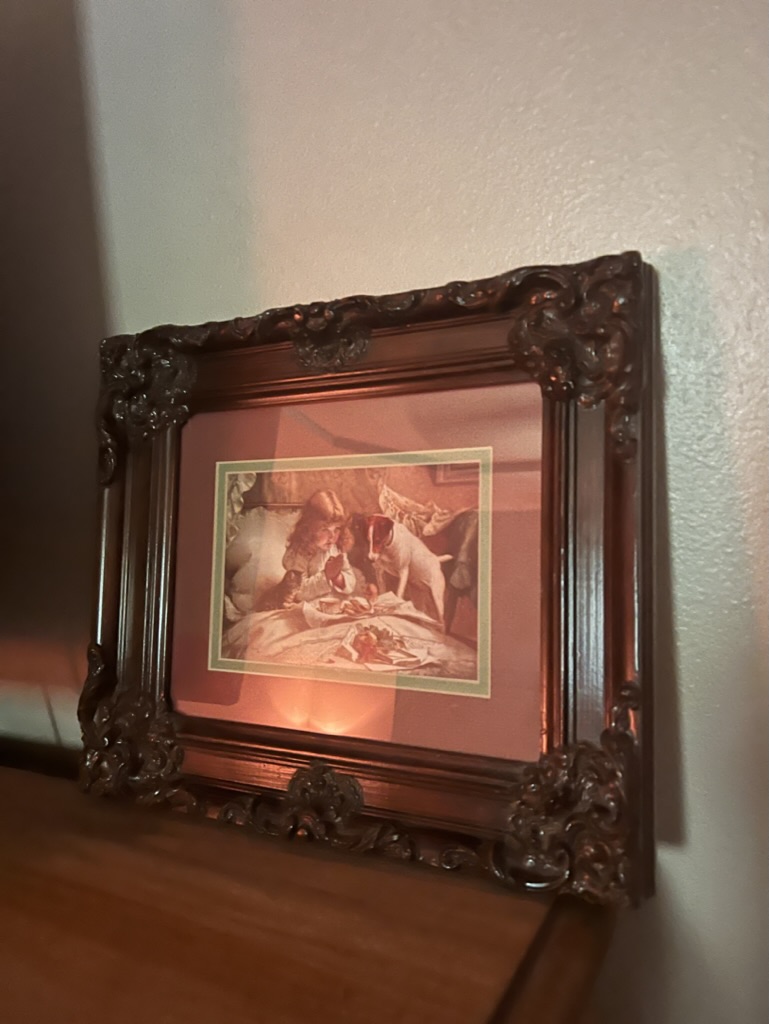
Now, the art wasn’t my style, nor was the chocolate brown frame. But it was solid wood and it was cheap, so I happily took it home ready to give it a refresh.
You may not know me or my style very well yet, but there’s one thing I’ll tell you: I love gold and brass. I felt like this frame had perfect detailing to really pop as a gilded frame. I enlisted some help from Rub-n-Buff (this stuff is awesome) and got to work.
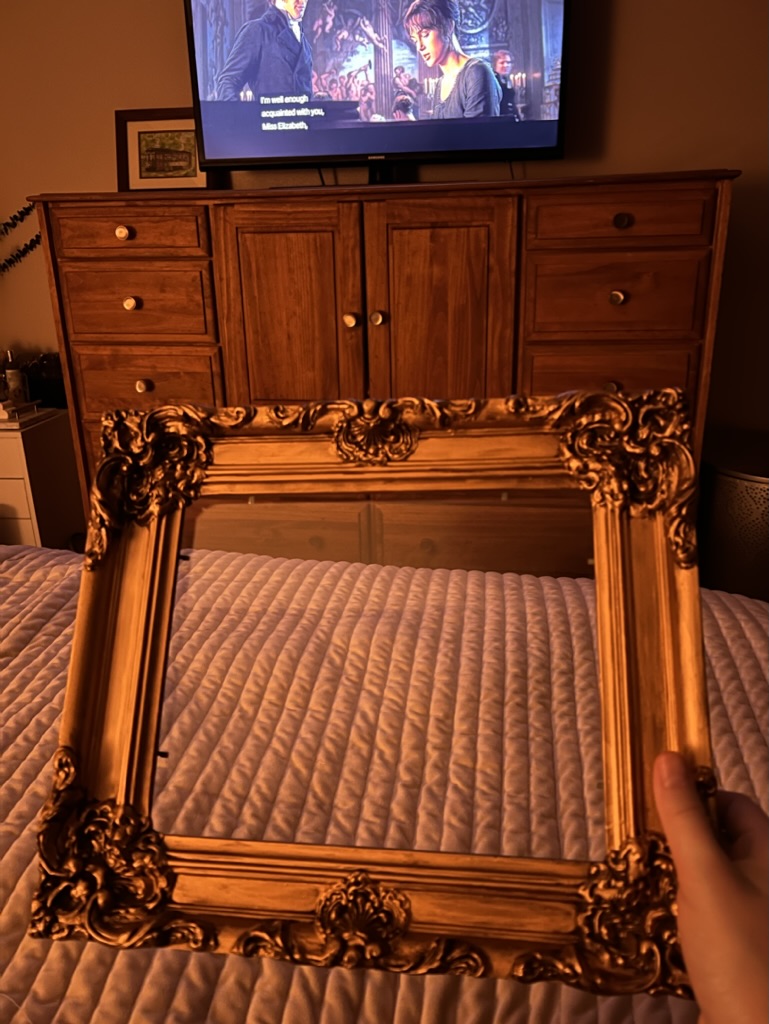
If you’ve never used Rub-n-Buff, I highly suggest it. It’s a waxy paint and comes in multiple finishes. It is a great option for refinishing items you already have. This is in antique gold. They also offer additional gold shades as well as silver and black finishes. The best part is that it’s very affordable and a little really does go a long way. You can simply put some on your finger and rub it in. You can use a paintbrush as well. Check this great post here comparing the different finishes of Rub’n Buff: https://www.lizmarieblog.com/2021/01/trying-all-the-rub-n-buff-colors/
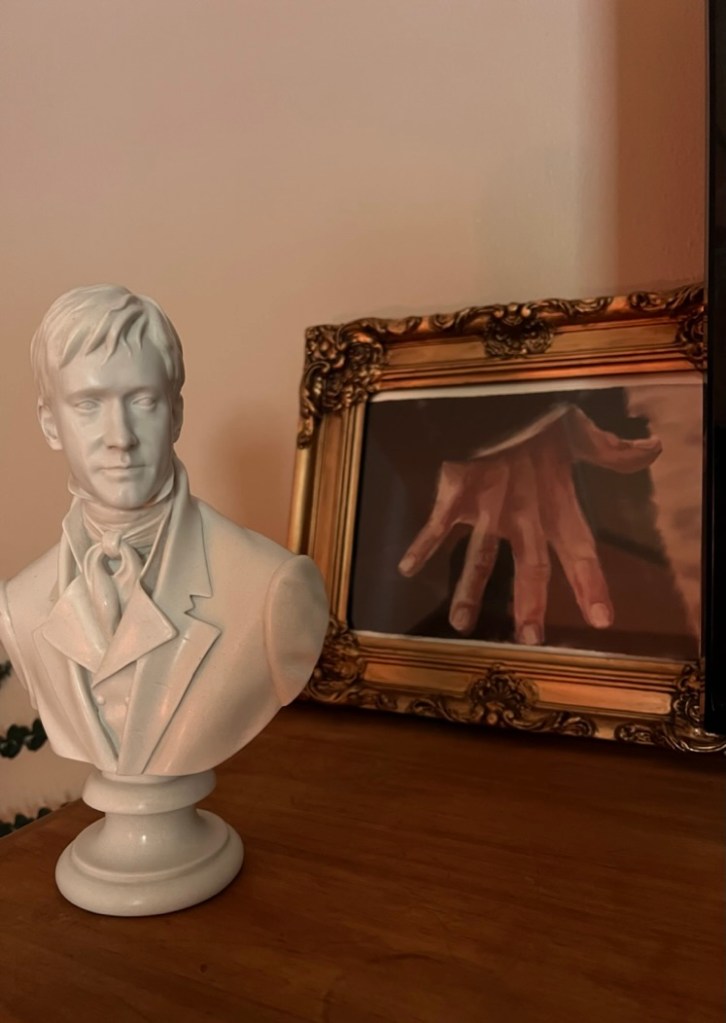
If you noticed, I had an iconic movie on while doing this project. So it was only right that I put one of my most prized possessions, a print of The Hand Flex (I got it from this seller on Etsy) in this frame, next to one of my other most prized possessions (a marble bust of Mr. Darcy, also from Etsy).
This little makeover took about $20 in total for both the frame and the Rub’n Buff and about an hour of work. Not bad if you ask me! Next time you see a good quality frame at the thrift, you should try this and tag me!
*This post may contain affiliate links.

Leave a comment