
Let’s make a mummy for halloween! I first did this with my mom probably 15 years ago, and finally wanted to make one for myself. Credit for the original idea comes from a craft magazine from years ago. I took a screenshot of it, but the instructions don’t seem to be anywhere online. So here they are:
Transcribed from the photo:
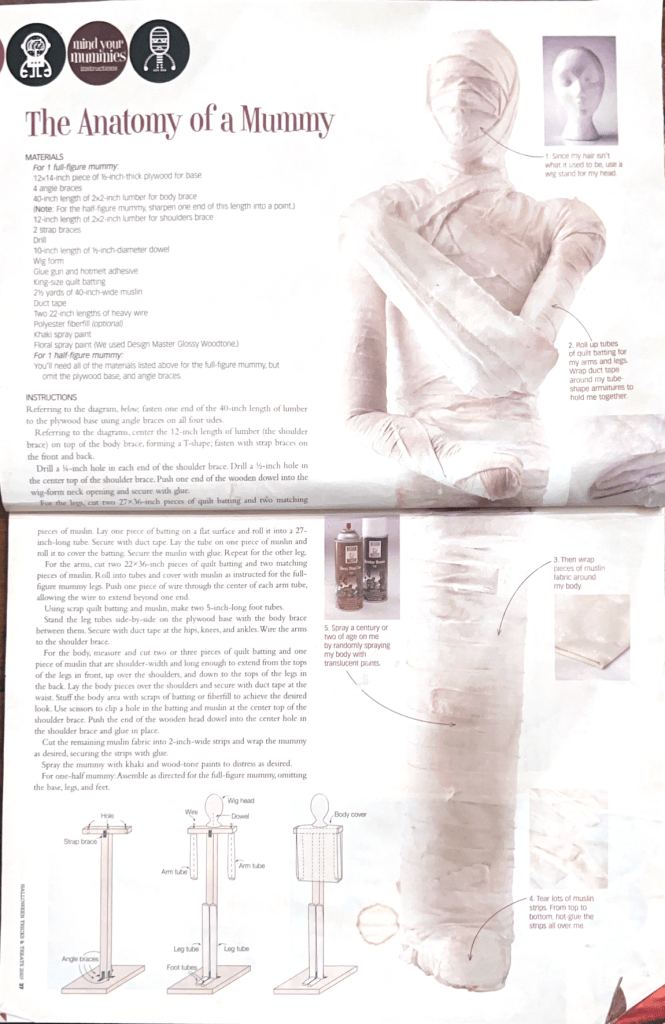
The Anatomy of a Mummy
**MATERIALS**
For 1 full-figure mummy:
* 12.14-inch piece of ½-inch-thick plywood for base
* 4 angle braces
* 40-inch length of 2×2-inch lumber for body brace
(Note: For the half-figure mummy, sharpen one end of this length into a point.)
* 12-inch length of 2×2-inch lumber for shoulders brace
* 2 strap braces
* Drill
* 10-inch length of ½-inch-diameter dowel
* Wig form
* Glue gun and hotmelt adhesive
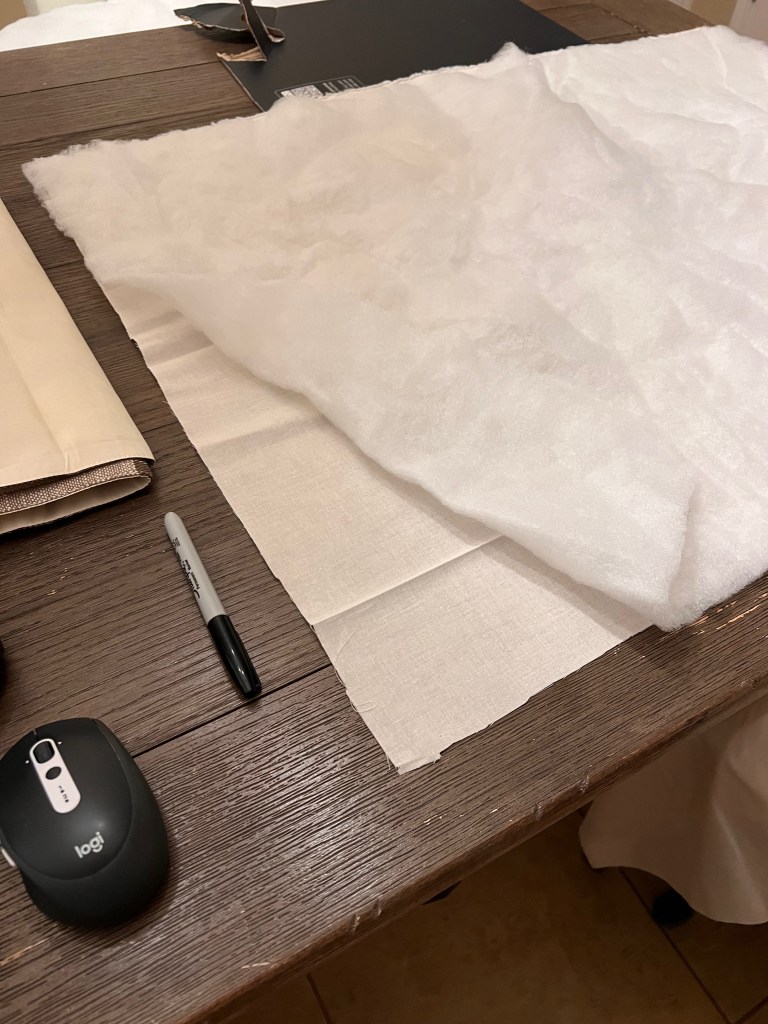
* King-size quilt batting
* 2½ yards of 40-inch-wide muslin
* Duct tape
* Two 22-inch lengths of heavy wire
* Polyester fiberfill (optional)
For 1 half-figure mummy:
You’ll need all of the materials listed above for the full-figure mummy, but
omit the plywood base, and angle braces.
**INSTRUCTIONS**
Referring to the diagram, below; fasten one end of the 40-inch length of lumber to the plywood base using angle braces on all four sides.
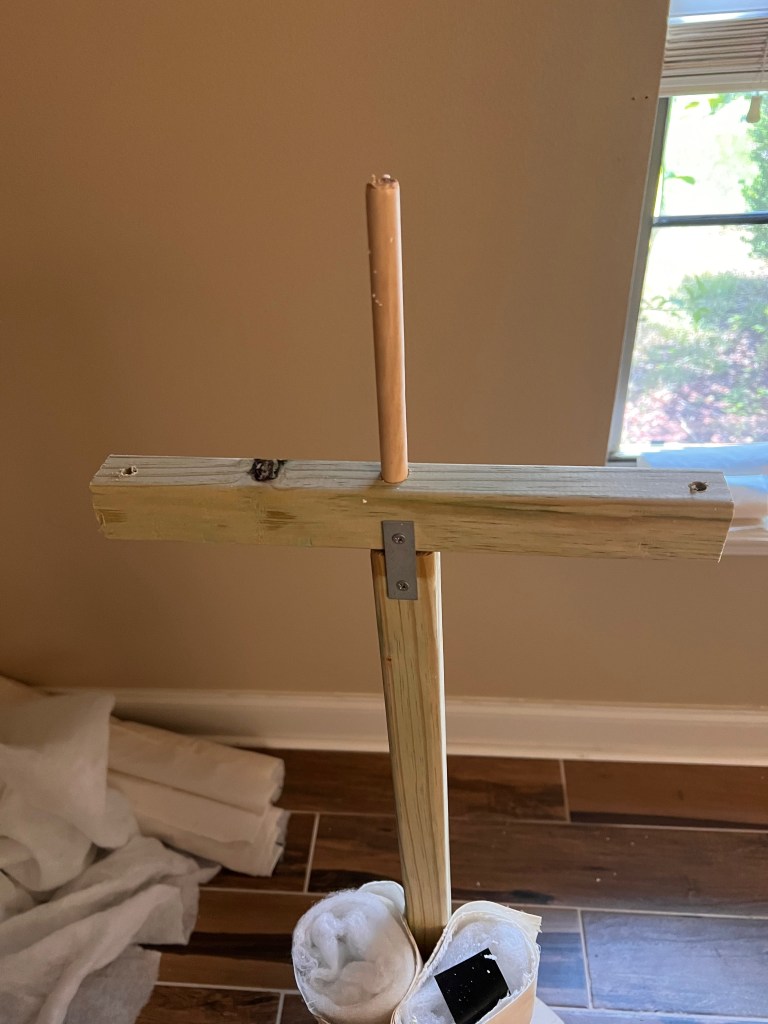
Referring to the diagrams, center the 12-inch length of lumber (the shoulder brace) on top of the body brace, forming a T-shape; fasten with strap braces on the front and back.
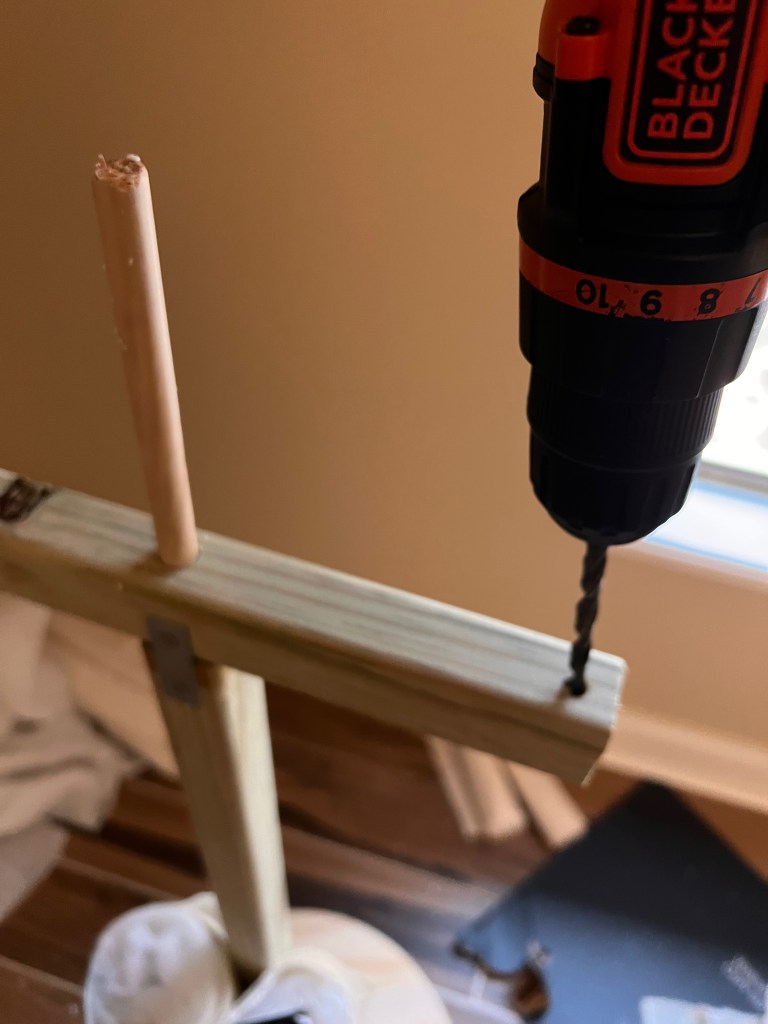
Drill a ¼-inch hole in each end of the shoulder brace. Drill a ½-inch hole in the center top of the shoulder brace. Push one end of the wooden dowel into the wig-form neck opening and secure with glue.
For the legs, cut two 27 x36-inch pieces of quilt batting and two matching
pieces of muslin. Lav one piece of batting on a flat surface and roll it into a 27. inch-long tube. Secure with duct tape. Lay the tube on one piece of muslin and roll it to cover the batting Secure the muslin with glue. Repeat for the other leg.
For the arms, cut two 22×36-inch pieces of quilt batting and two matching pieces of muslin. Roll into tubes and cover with muslin as instructed for the full-figure mummy legs. Push one piece of wire through the center of each arm tube allowing the wire to extend beyond one end.
Using scrap quilt batting and muslin, make two 5-inch-long foot tubes.
Stand the leg tubes side-by-side on the plywood base with the body brace between them. Secure with duct tape at the hips, knees, and ankles. Wire the arms to the shoulder brace.
For the body, measure and cur two or three pieces of quilt batting and one piece of muslin that are shoulder-width and long enough to extend from the tops of the legs in front, up over the shoulders, and down to the tops of the legs in the back. Lay the body pieces over the shoulders and secure with duct tape at the waist. Stuff the body area with scraps of batting or fiberfill to achieve the desired look. Use scissors to clip a hole in the batting and muslin at the center top of the shoulder brace. Push the end of the wooden head dowel into the center hole in the shoulder brace and glue in place.
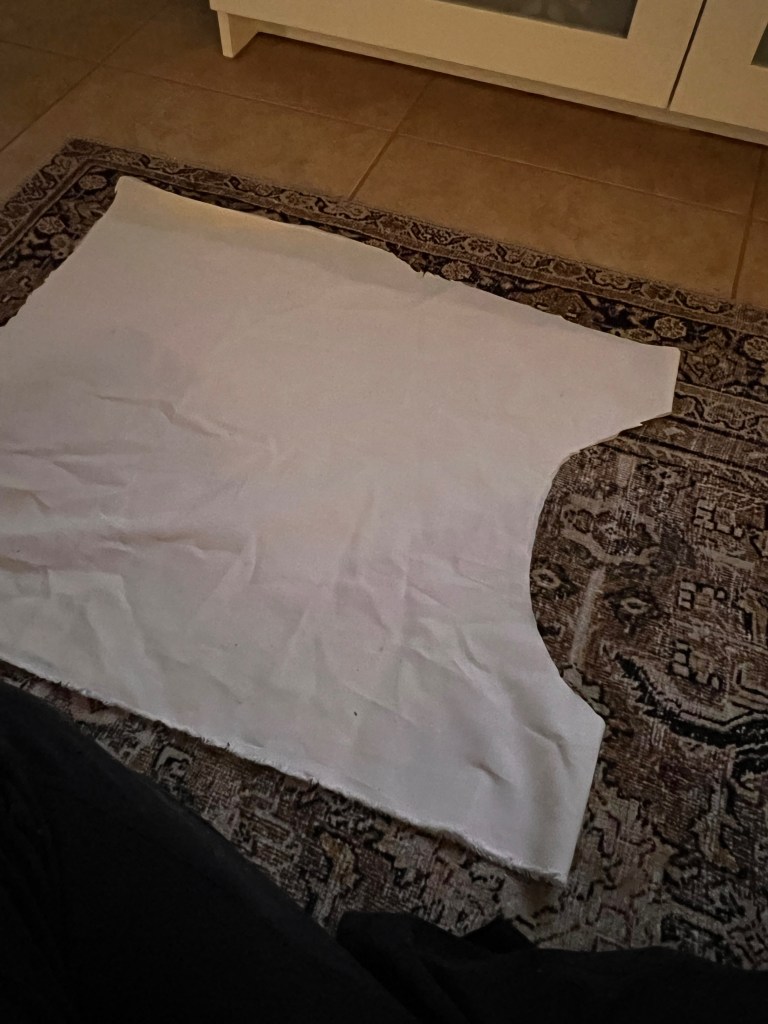
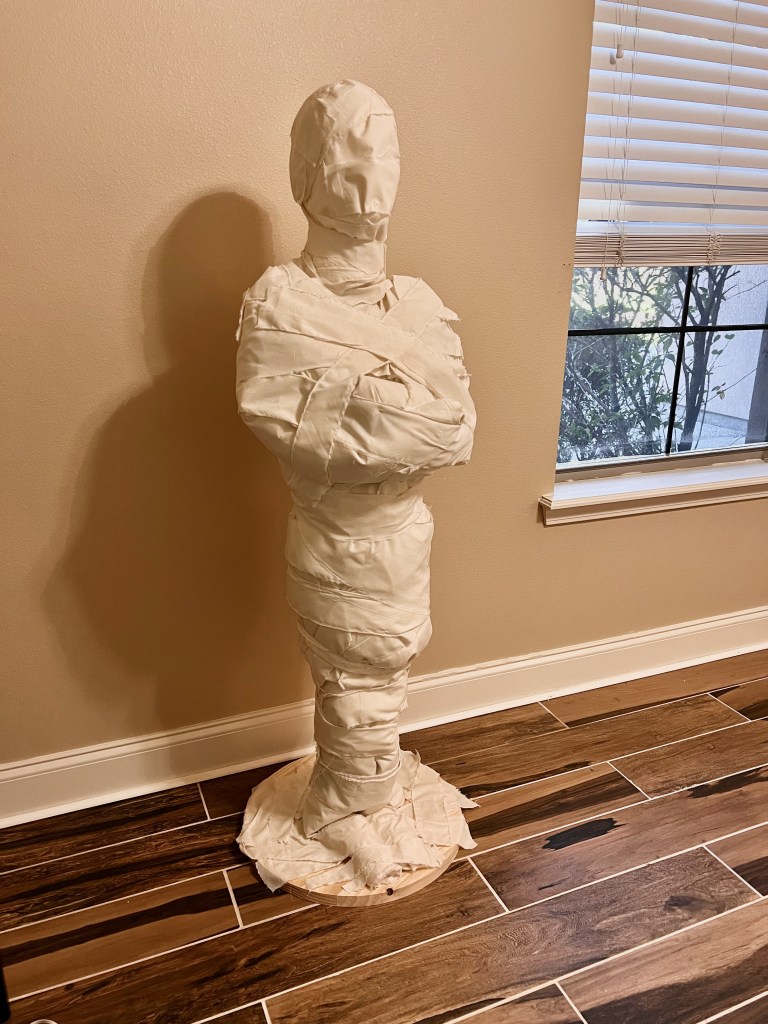
Cut the remaining muslin fabric into 2-inch-wide strips and wrap the mummy as desired, securing the strips with glue.
Spray the mummy with khaki and wood-tone paints to distress as desired.
For one-half mummy: Assemble as directed for the full-figure mummy, omitting the base, legs, and feet.
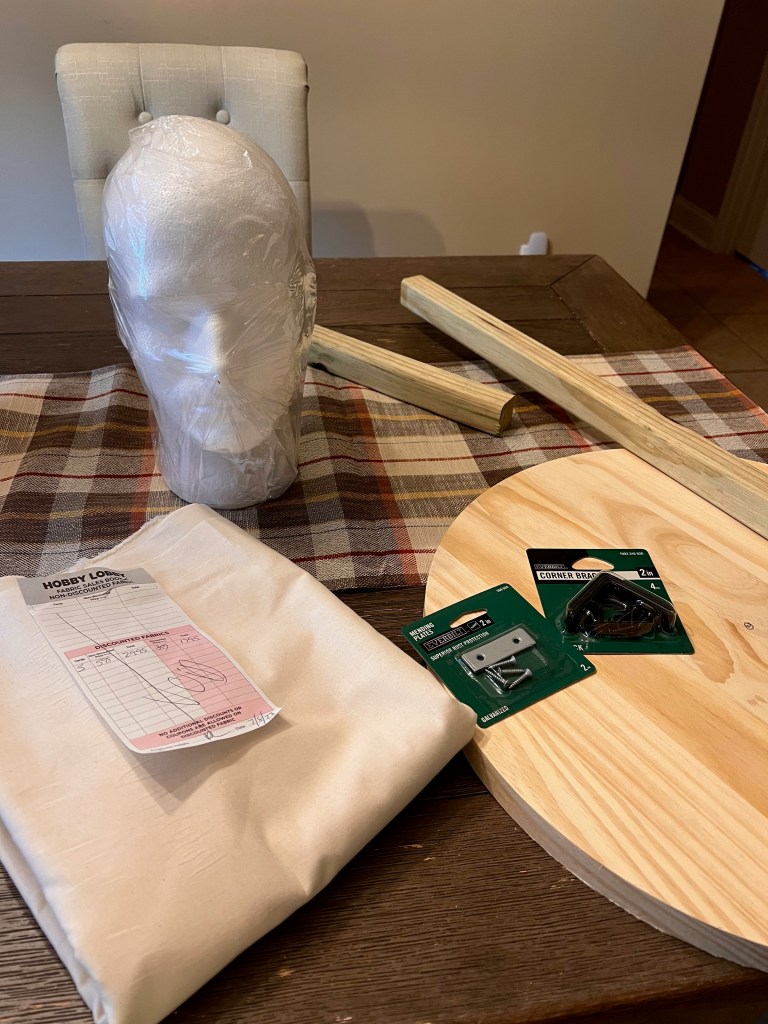
I documented every step of the DIY below to make it easier to follow. I made a couple of adjustments – I used a male wig form instead of female for the head like the original instructions. You can also find these at the craft store. I also chose a thicker, circular base for the mummy to stand on as opposed to a rectangular one. I didn’t opt to use spray paint to make the mummy look aged, but left it as plain muslin.
Tools Needed: you’ll want to have a drill and a hot glue gun for this project.
The wig form and muslin can be found at Hobby Lobby or Amazon. I initially bought 5 yds of muslin, but ended up needing about 3 additional yards. Supplies laid out (forgot to include the batting here):
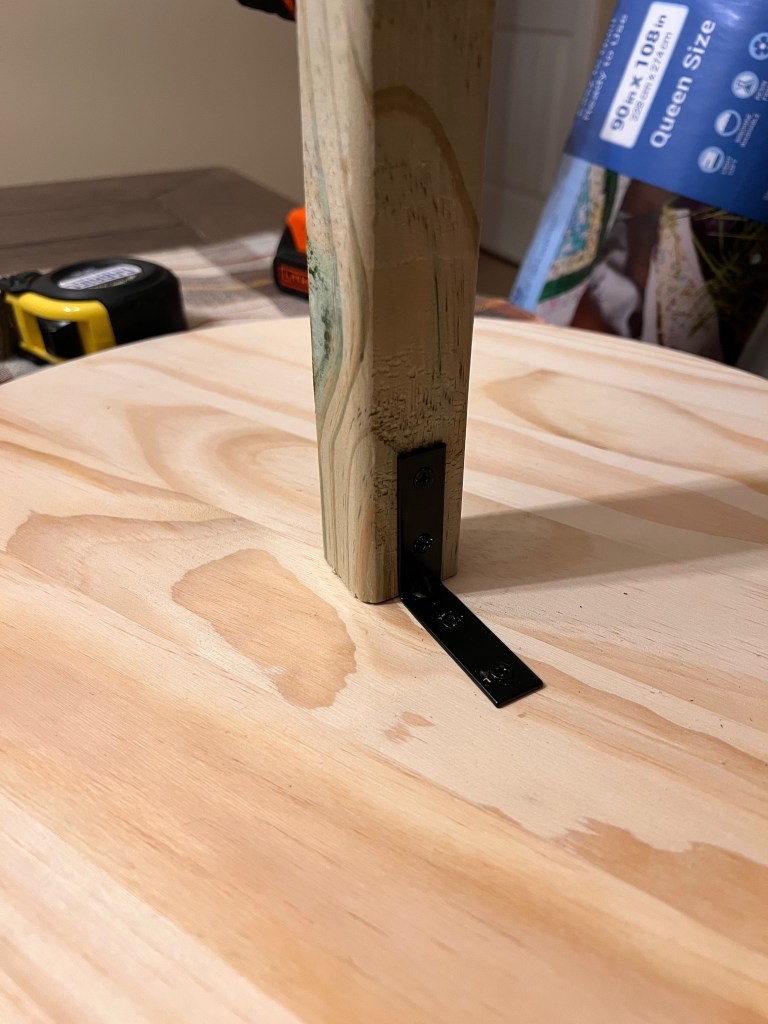
Step 1: use the corner braces and drill to attach your post to the center of your base on all four sides.

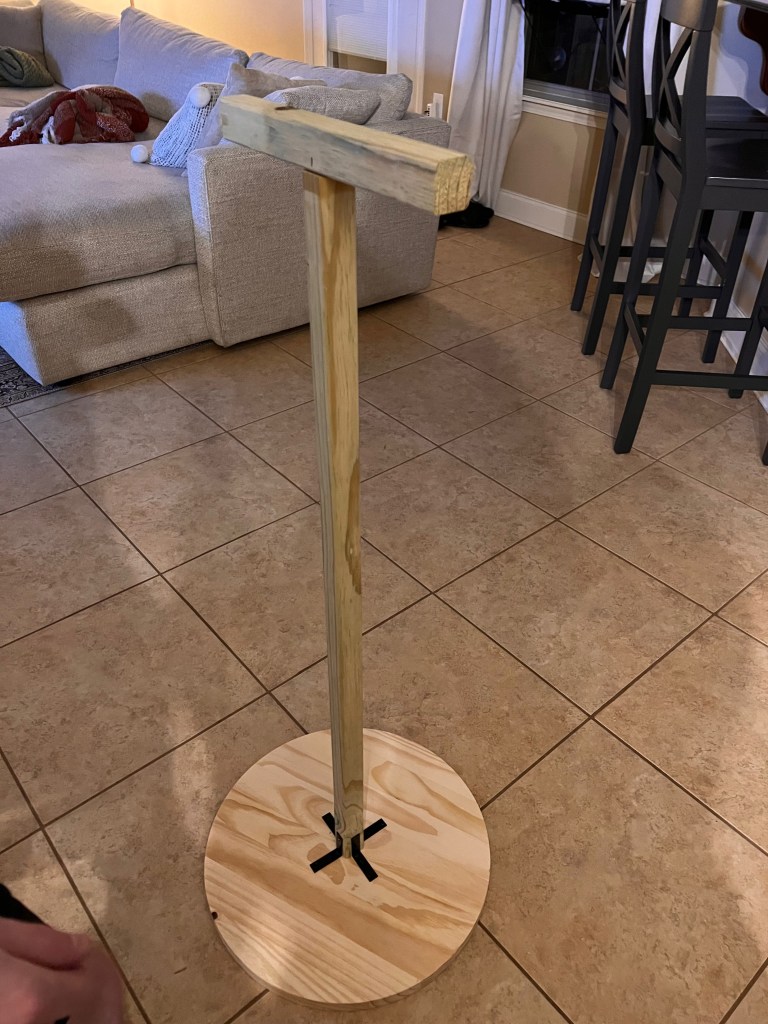
Step 2: use the strap/flat braces to attach the shorter post (shoulder base) to the center post.
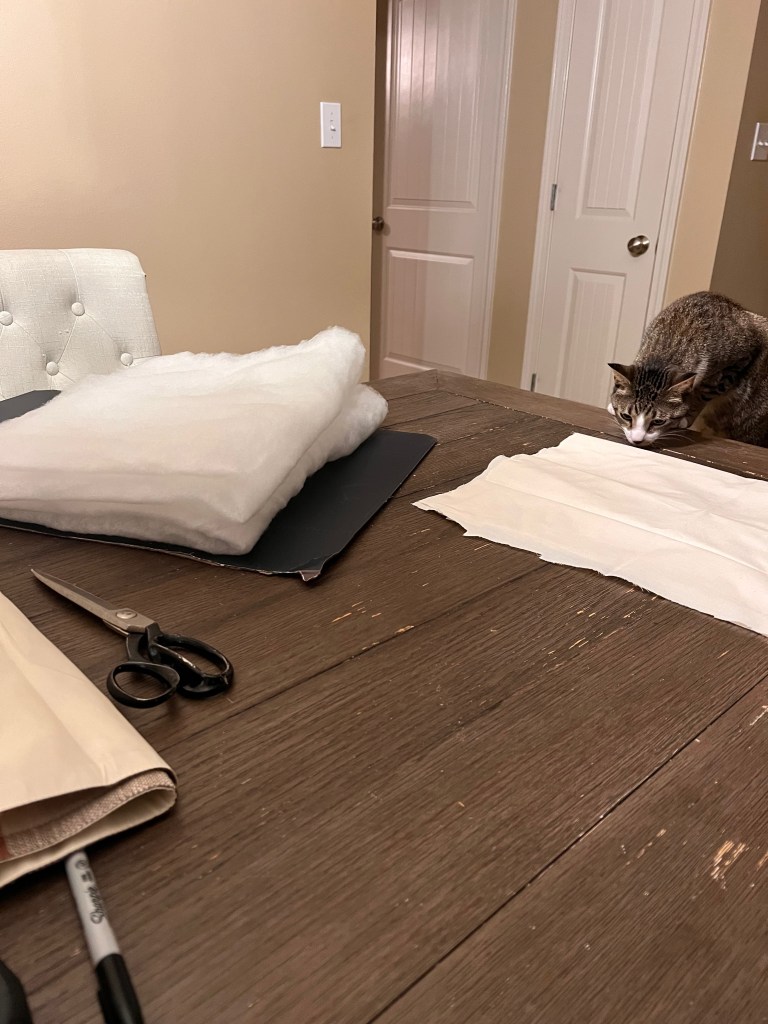
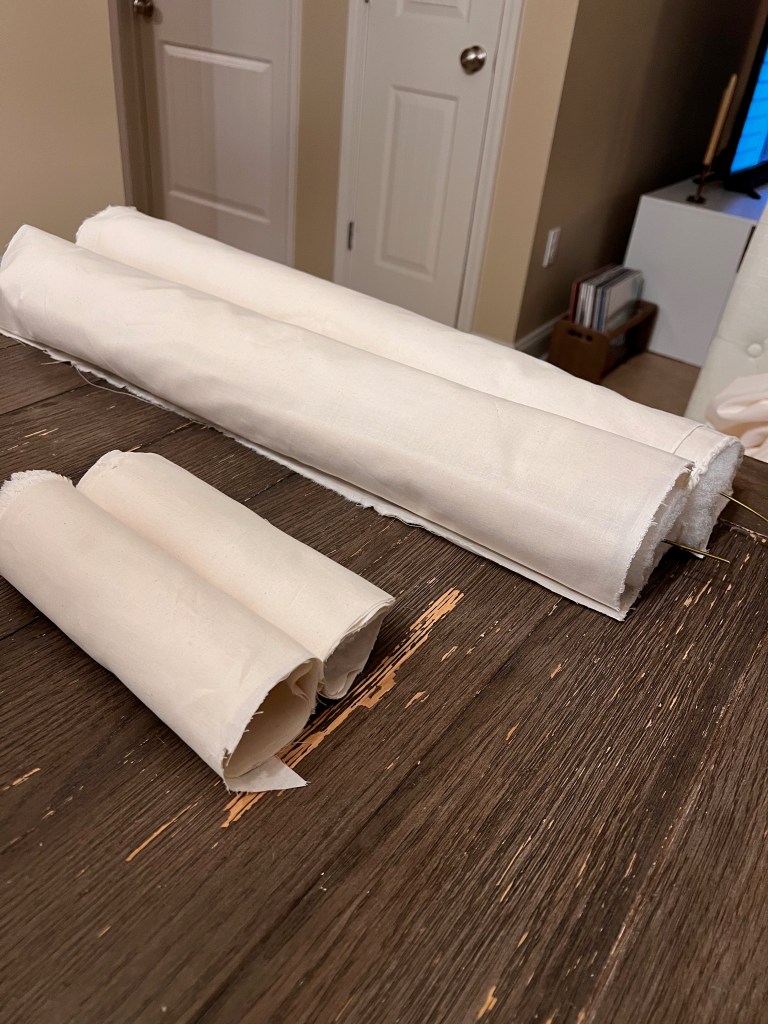
Step 3: For the legs, start measuring out your poly-fill and muslin sheets. (27×36 in. for each leg)
It’s good to have some Quality Assurance on the jobsite.
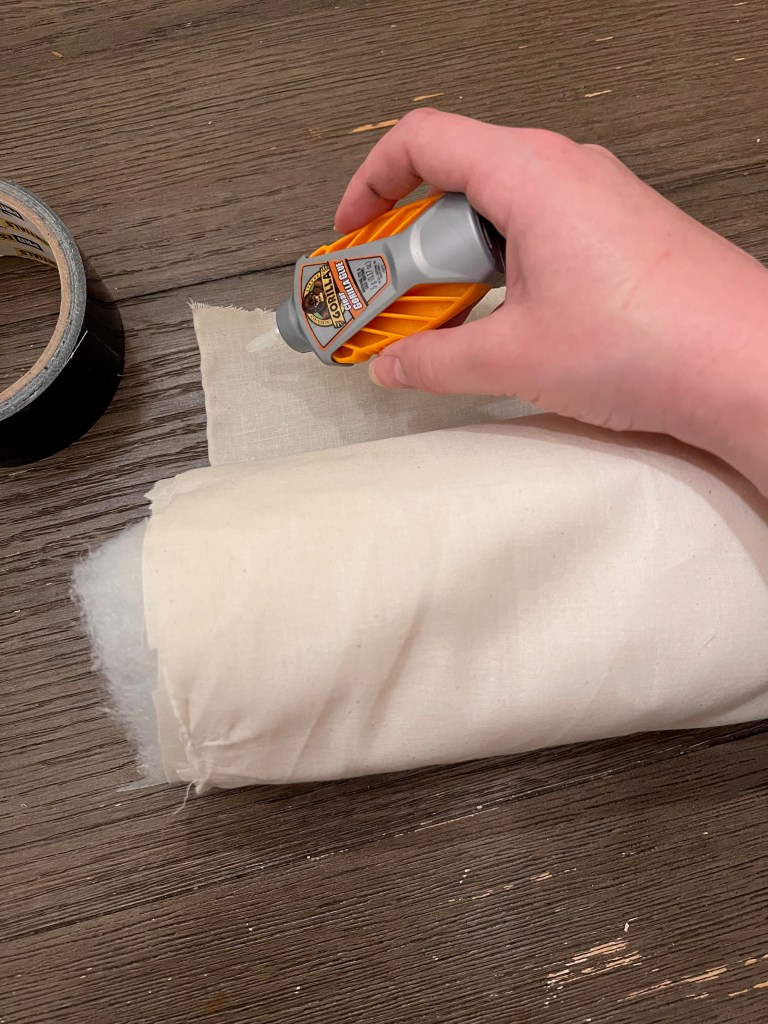
For each leg, roll up your 27×36 poly-fill sheet to a tube shape and secure with hot glue.

Next, take the 27x36in sheet of muslin and wrap it around the poly-fill and secure it with hot glue.
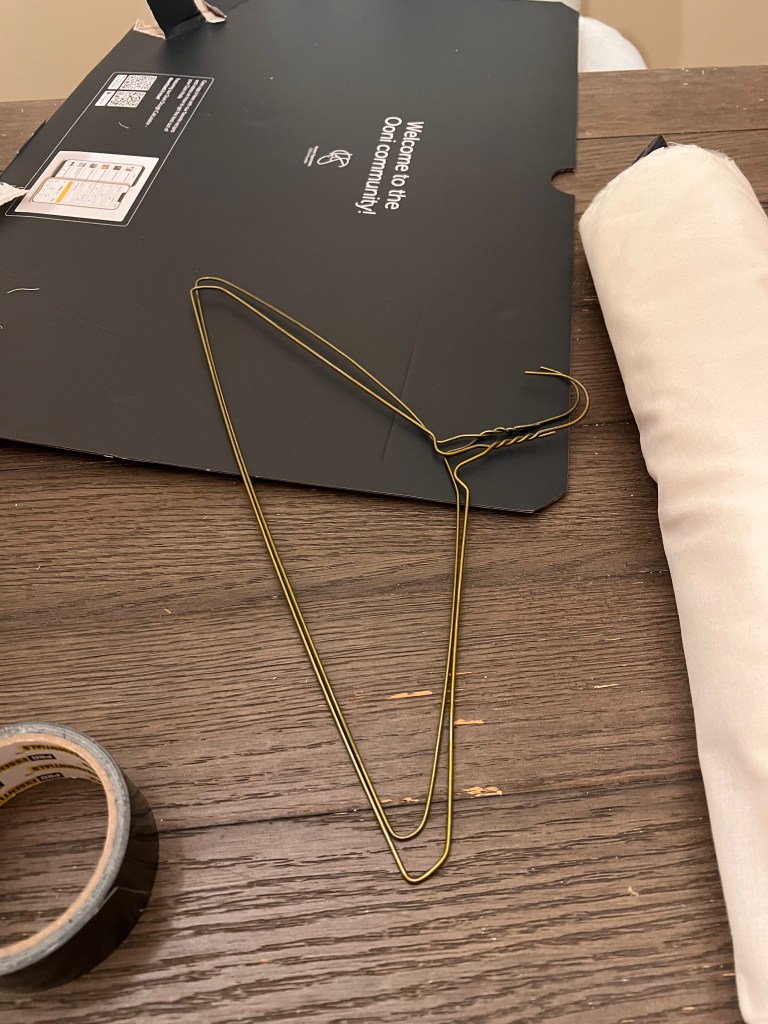
For the arms, you’ll follow the same steps but with smaller measurements: 22×36 inches of both poly-fill and muslin for each arm. You also want to add some sort of wire to make the arms posable. I used an old hanger on each (untwisted and snipped to length).
Here’s what the arm and leg situation is looking like.
In the center of the shoulder brace, use your 1/2in drillbit and place your 10 inch dowel into the hole. After placing the dowel, secure it into place with some hot glue. On the sides of the shoulders, drill 1/4in holes for the wires in the arms to go through.
Place the head on the dowel, and secure the legs to the post with duct tape.


Attaching the arms.
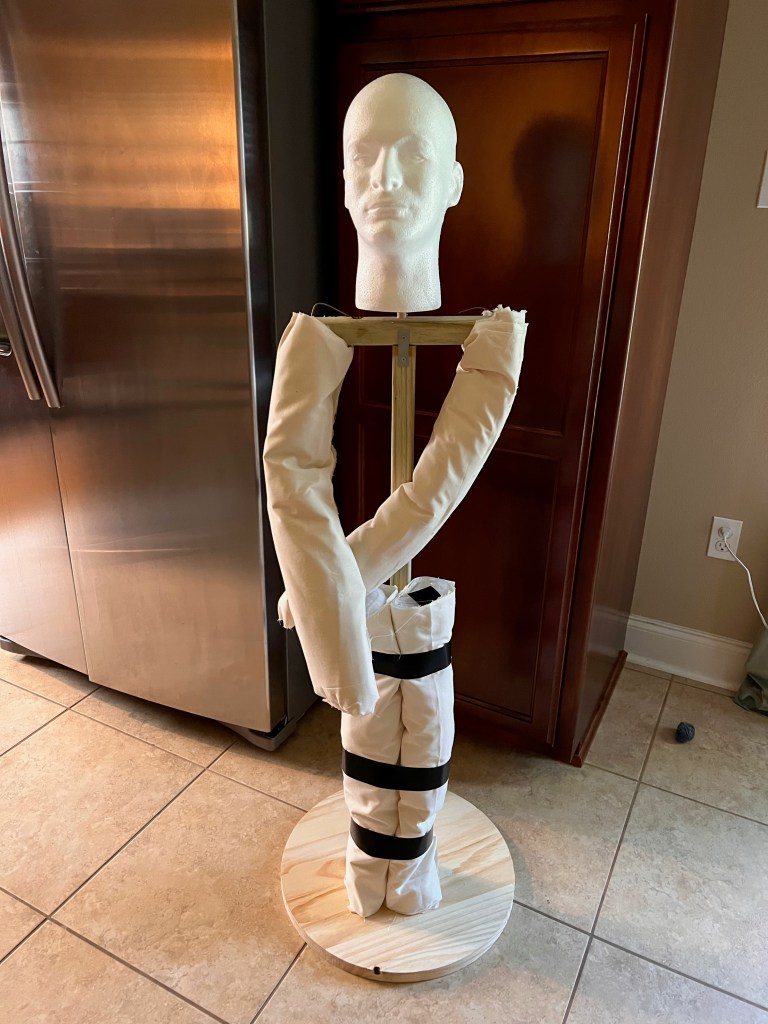
Cut a piece of poly fill for the torso, and a matching piece of muslin. Secure feet to base with hot glue.
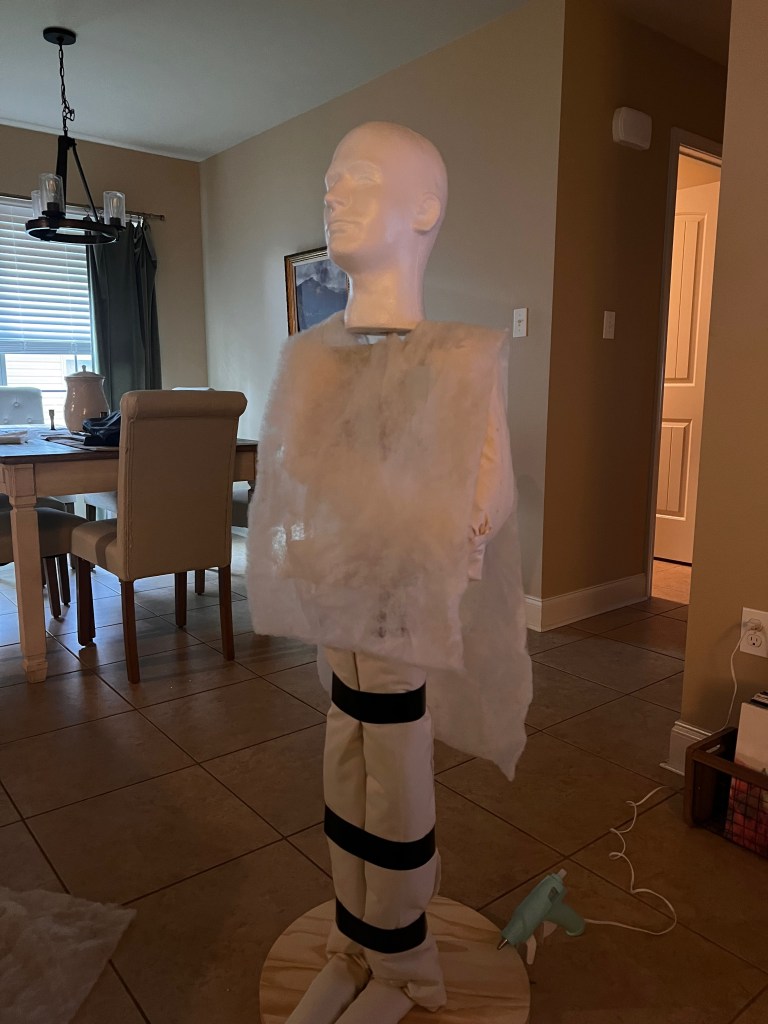

He’s a skinny legend
Start tearing your muslin into a bunch of 2-inch strips. Start adding the strips to the mummy, securing with hot glue. It’s all about the layering here

This will take a while and is pretty brainless, so I popped on a movie while I tore my strips, turned on my glue gun, and started placing the strips of muslin.
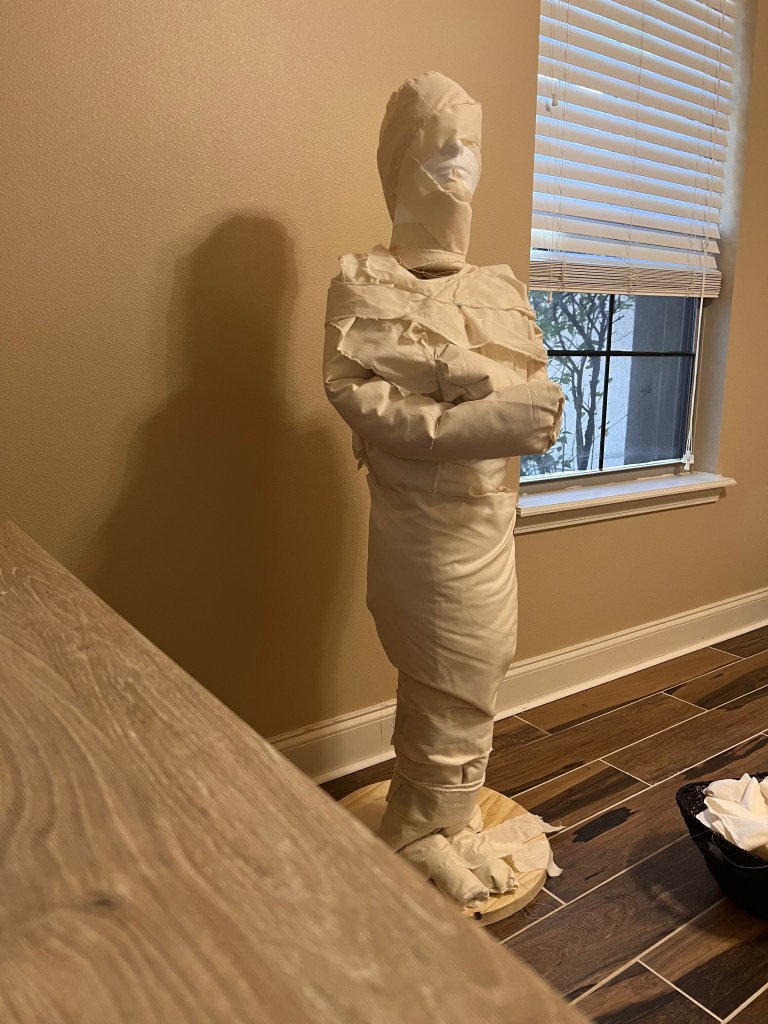
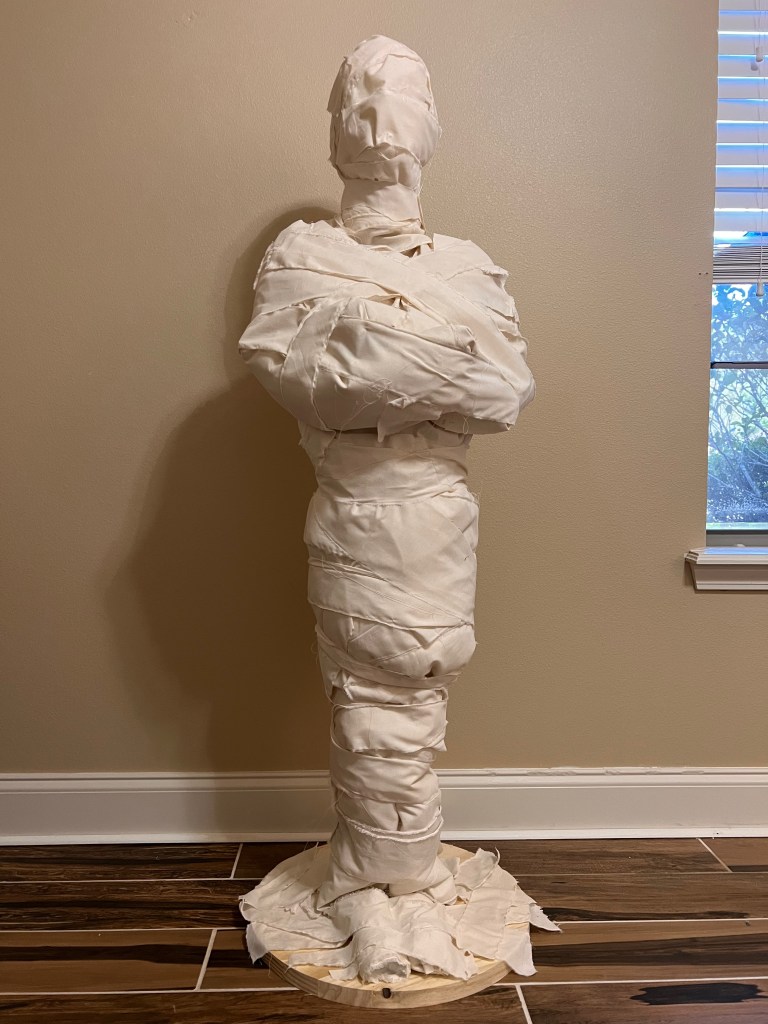
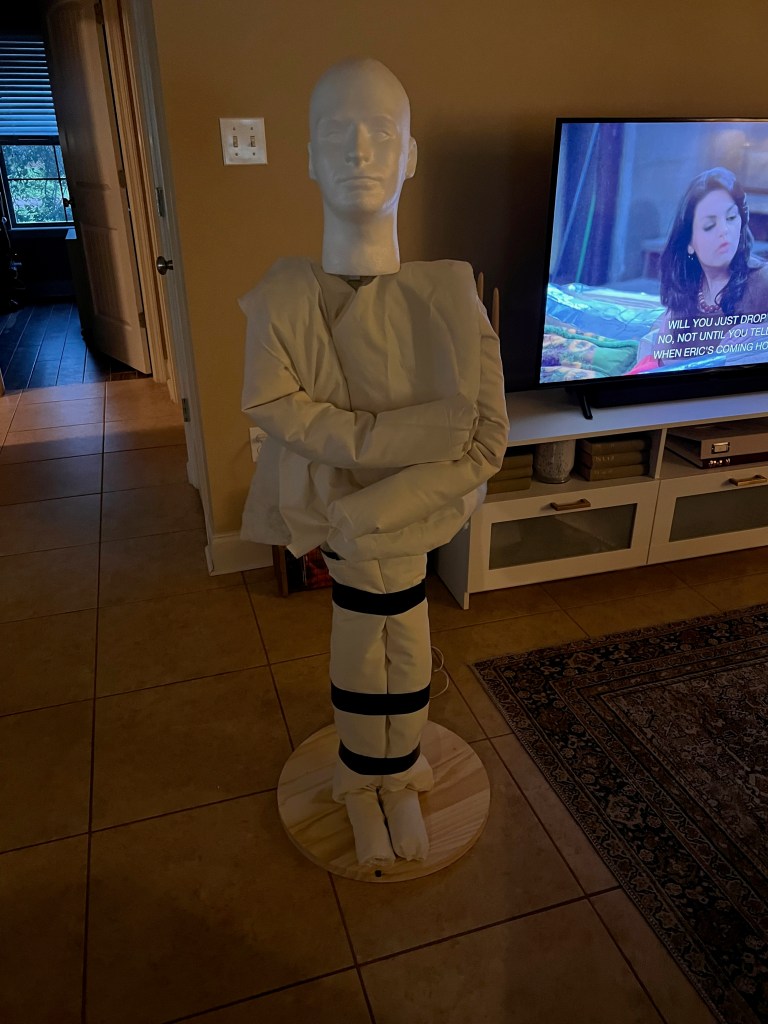
This is where I stopped, although I could use a bit more muslin to finish covering the base. I’ve also considered just painting the base in a cream color so it is less obvious.
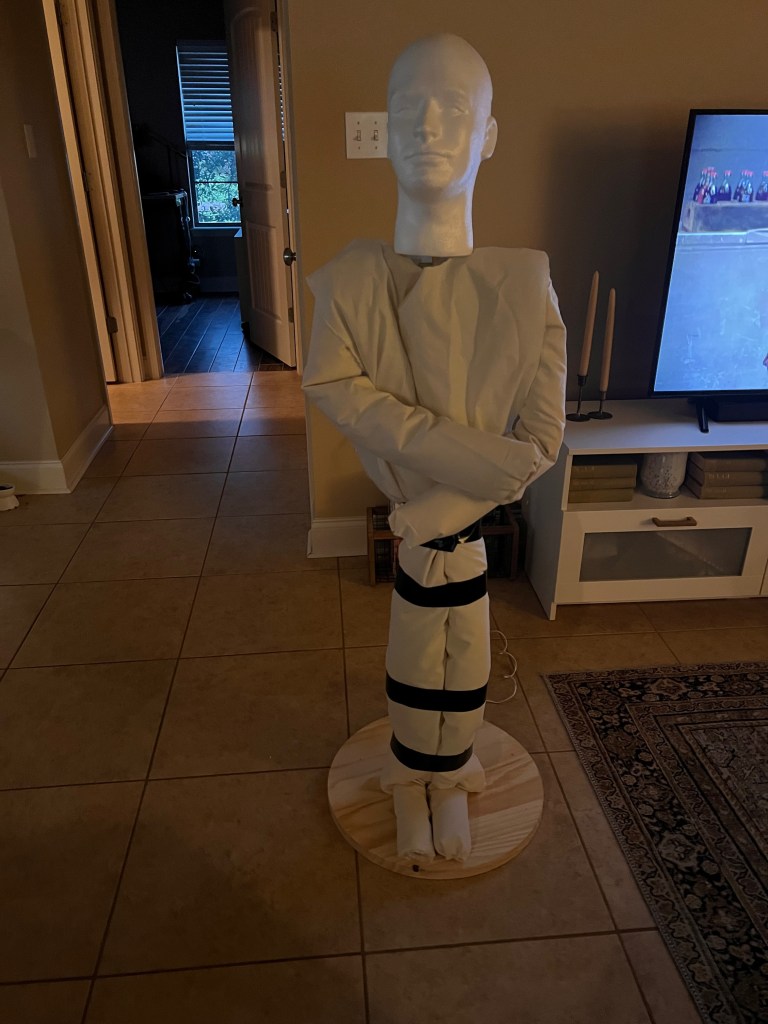
And here he is chilling outside!


Leave a comment